If you like the work I do on this blog, please consider supporting it via my Patreon or a Ko-fi tip.
Reaper Miniatures has already released the Madame Delia figure in metal. She is also going to be made into a Bones figure as part of the core set of Bones 5. (Late pledges are available.) that is currently running. So I thought this would be a good time to share my paint job on this terrific figure.
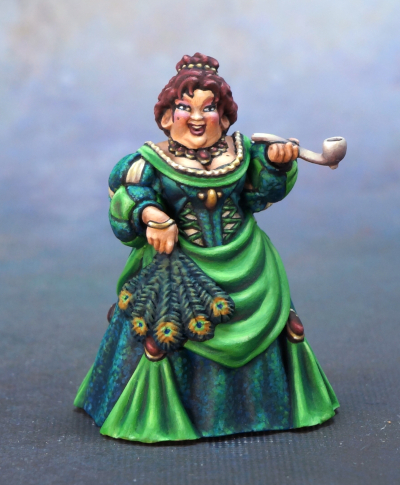 I do hope to add a base to her some time soon!
I jumped at the chance to paint this figure. I’m a fat woman, and it’s nice to every now and then paint a figure that looks a little like me. But much more importantly – look at her outfit! I often implore Reaper’s art director, Ron Hawkins, to include more figures in fancy dress or historical costume, and this certainly fits the bill, so how could I resist? I’ll talk a little more about my approach to painting the clothing below.
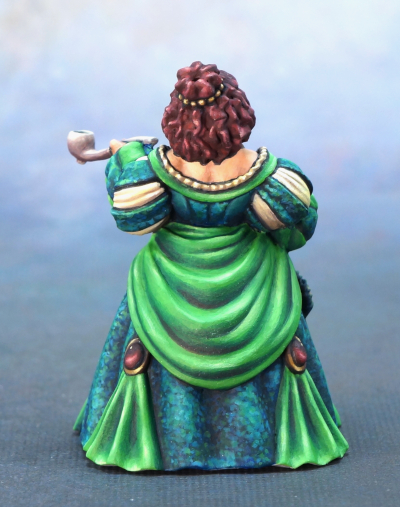
Madame Delia is based on fantastic concept art by Izzy ‘Talin’ Collier, which you can enjoy below. She was brought to three dimensional life by the talented sculptor, Bobby Jackson. Although I expect that she will see game use as a noble, a merchant, a mayor, and many other ideas, she was designed as a specific character in Reaper’s Dreadmere setting, and has a backstory by Ron Hawkins and Joseph Wolf. I painted her to match the sketch and the character notes.
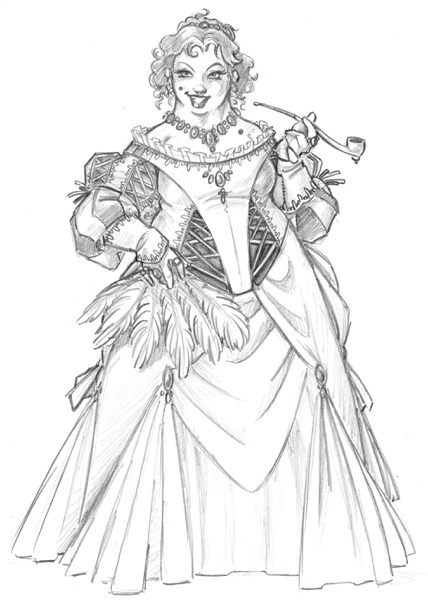 Concept art for Madame Delia by Izzy ‘Talin’ Collier.
In the world of Dreadmere, Madame Delia runs a punchhouse called the Drowned Waif. The brothel caters to exotic tastes and employs performers of diverse background and appearance who have a great range of talents. Its proprietor has a fondness for excessively elegant gowns and accessories. She also has a predilection for the drug hagshair, smoked from a long ivory pipe. (Such habits are an unfortunate consequence of living in the tumultuous area of Dreadmere!)
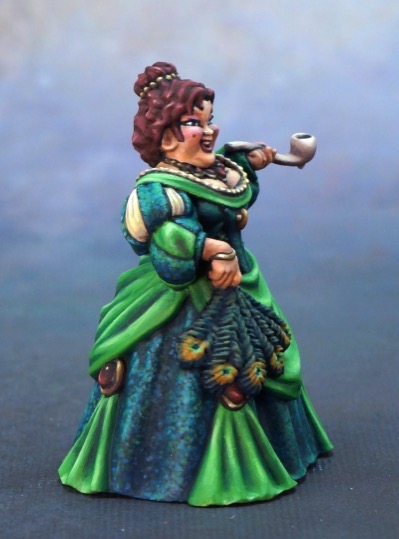
My vision for Delia’s appearance was one that was dramatic, but not too over the top into garish. Taking a cue from the feather fan, I went with a peacock colour scheme and motif. Since Delia is a lot of woman wearing a lot of fabric, I wanted to paint at least two noticeably different types of cloth to prevent it from feeling like too much of the same thing. I picked a dark blue-green for the cloth of the main dress. Years ago I experimented with a colour and texture like this with a very quickly painted test figure. This seemed like an opportunity to try to execute the idea to more of a display level style of painting.
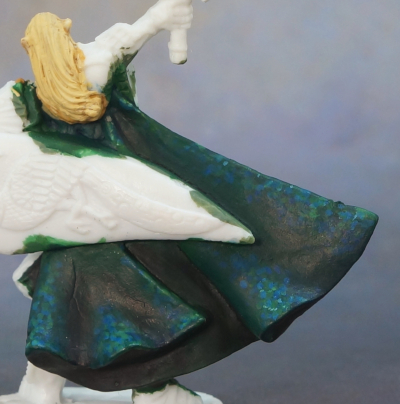 This quick test figure was done in ~15 minutes using a synthetic brush.
To paint the cloth, I started with a fairly dark basecoat colour over the entire area. Then I highlighted up by stippling tiny dots of various shades of blue, green, and teal. To paint these, I used a smaller than usual sable hair brush with a very fine tip. I painted one value level of dark shadow with a very dark blue and dark green, then three or so value levels of highlights. For each level I used two to three paints of roughly the same value (how dark or light the colour is), but different shades of blue/green/teal. Then I glazed over the cloth with a thinned down and very transparent coat of a dark blue-green in the crevices, and a lighter one on the peaks of the folds. The level of contrast between the darkest values and the lightest ones is noticeable, because contrast is important to make things look three dimensional, but it’s not super extreme. Rather I’m using the texture to add some visual interest and create the appearance of a rich velvet or something with a little shimmer.
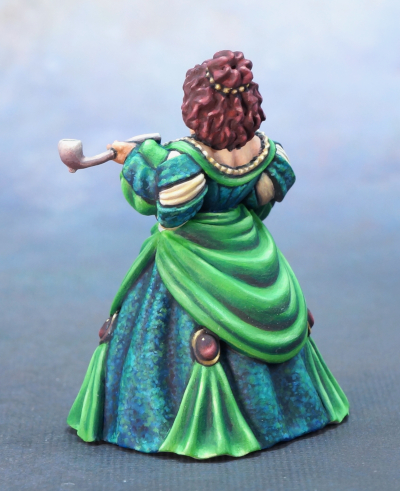 I love those slashed sleeves so much!
By comparison, the lighter green cloth draped on top of the main dress has much more extreme contrast between shadows and highlights. Here I was aiming for a shiny silk type of look, so the crevices shade down to almost black, and the highlights are a yellowy off-white. To add further depth and richness to the shadows, I painted a thin coat of one of the deep red colours from her hair into the darkest shadows. Since green and red are colour complements, this adds a bit of additional contrast even though it isn’t immediately obvious to the viewer’s eye. Whether steel or cloth, materials require a large range of contrast between the darkest and lightest values to appear shiny. The overall midtone value of the draped fabric is lighter than the main dress, so it is set apart from it in terms of colour, texture, and value. There is a third cloth material, as well. I painted the cloth seen through the slashed sleeves and lacing to appear as a pale linen type of fabric, which is pretty matte and so has a much smaller range of contrast between the shadows and the highlights.
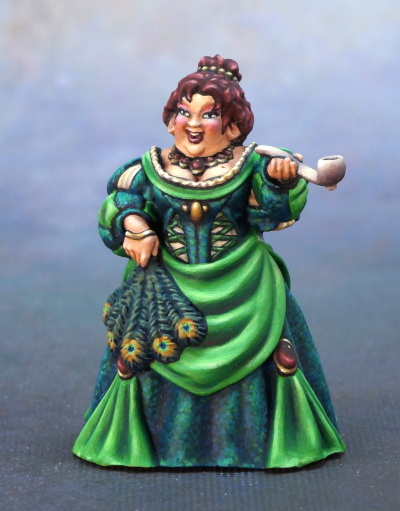
There is a lot of green (and blue) on the figure, so I tried to balance that out with my other colour choices. Delia seems like someone who would dye her hair, and I decided on a not-natural burgundy type of redhead choice as that seemed like something that would look good with the green, and also fit someone who enjoys looking dramatic. I used similar colours for the gems and her makeup. Green or blue eyeshadow seemed clearly over the line into garish, but a little bit of a deep pink for her eyeshadow and some matching lipstick and blush seemed like they would fit. I used a touch of reddish-purple in the shadows of the gold and ivory to help tie those into the main colour choices, as well. And of course peacock feathers for her fan!
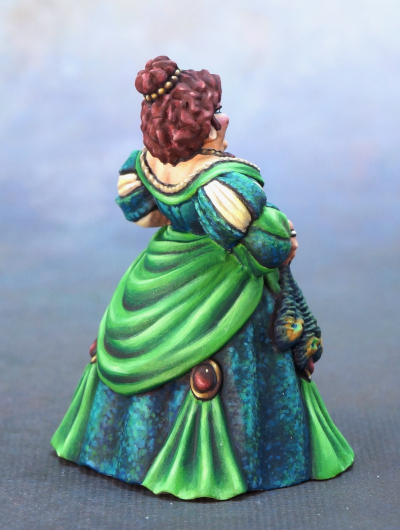
Madame Delia is available for purchase in metal right now. Or you can get a copy in Bones by making a late pledge on the Bones 5 kickstarter. It is my understanding that the figures in the core set, which Madame Delia is part of, will be made in the newer Bones Black material that is a bit stiffer and nicer for detail than classic Bones.
I love that stippling effect so much! I’m not quite getting how you did it from the description though. Is this it:
Base color: dark blue
Slightly brighter value than base: a blue, green and teal in this value
Brighter still: blue, green, real in this second value
Brightest: blue, green, teal
Are alot of the stiples overlapped? Do you have or could recommend any videos showing the method?
Thanks!
LikeLiked by 1 person
You have described the process pretty well. The one addition is that I did a darker shadow set of stipples in the deepest crevices.
The stipples are often overlaid and overlapping. This is necessary the more the value changes from the midtone. If you look at the highest peaks of the folds, you don’t see much if any of the darker blue-green colour, and it would look off if you did. Instead you see mostly mid value stipples and then lighter ones layered on top of them.
If you compare to the test cloak on the elf, you can see the difference in appearance if you don’t do stipples throughout the entire surface (on the cloak it was just on the highlight areas), and the difference it makes to do more and more layered dots over fast and quick just a few dots.
I learned this technique in person from Kirill Kanaev. I am not aware of a video that demonstrates it, though there may well be one out there. There are far more videos coming out than I can keep up with!
If you look at the back of the cloak in this post, you can see what the effect looks like with stipples that are all the same colour and just the value changes.
https://birdwithabrush.com/2018/12/03/caerindra-thistlemoor-roughing-in-lights-and-shadows/
LikeLiked by 1 person
Wow, that dress is amazing, love it.
The cheeky expression she has on her face is very playful, I think you’ve captured her character perfectly!
LikeLike
Thank you!
LikeLiked by 1 person