The Patreon supporter PDF version of this article includes additional photographs. Ko-fi tips are another way to help keep this content freely available to everyone.
Choosing colours is hard. So don’t choose – steal! This article offers tips for how to find, adapt, and apply an inspirational colour scheme to your figures, with links to videos demonstrating how I stole the colour scheme for this figure and painted it.

It’s valuable to study colour theory and become more confident choosing colours on your own. However, studying and applying the colour schemes that other artists choose is a great way to practice hands-on with colour theory.
I worked out the colour scheme and painted Elanter the Lost Prince on my stream show, Beyond the Kit. Part of my aim on that show, and with many of these articles, is to share the thought process behind what I paint. We tend to put most of our focus on the technique aspect of miniature painting – learning to wetblend or paint non-metallic metal, for example. And we can alway work to improve our technique, of course!

However, once painters have a certain level of competence with a brush, their technique is not holding them back as much as they may think. Often what is needed to improve has more to do with colour choices and use of value (contrast!) than with how they’re applying the paint. A better understanding of how to make those choices is critical to improving as a display painter. Those thought processes are also pretty helpful to tabletop painting. Effective colour choices and clever use of contrast can allow you to streamline some steps, while still painting figures that have great visual impact on the table.

Below you will find some tips for how to find and apply colour scheme inspiration to your miniatures. I am not suggesting that you need to do all of these steps for every figure, but if you’re having trouble identifying and matching colours to an inspiration source, these steps should help make it a little easier.
![]()
Video Version
If you want to skip straight to the videos of choosing the colour scheme and painting Elanter, you’ll find the links below.
Part 1: Stealing the colour scheme, painting the green cloak. I spend some time on a question about mixing colour in the middle of the video, then return to working on Elanter.
Part 2: Blocking in the main colours
Part 3: Painting the scabbard, arrows, robe, quiver, and finishing up the cloak
Part 4: Painting the front of the cloak, leather (boots, belt, straps), faux woodgrain on weapon haft, bow, hair, and checking the value contrast level
Part 5: Painting the base, metallic weapon and trim, a simple method for painting gems, and hands
I think I painted the face off-stream, but you can watch the recording of another stream where I focused on painting faces.
The only WIP shot I took is of the back of the cloak after the first session of streaming. The middle fold shows what it looked like after some initial wetblending. The rightmost fold is what it looked like after I did some smoothing and enhancing of the initial wetblending. The rough layers on the left are an example of a paint method you can use to push your level of contrast, which I talk about in the Part 1 video.

The photograph on the left was taken with an iPhone 12 Pro, the one on the right with my usual miniature photography camera, a Sony Alpha NEX-F3. Both are of the same stage of painting, the differences are due to the photography alone. You can read more about how I take pictures of miniatures in this post.
![]()
Where to Steal Colour Schemes
Where might you find colour schemes to steal? The colour scheme of a miniature you admire is one option. So is your favourite fantasy and sci-fi art. But you don’t need to look at only the type or genre of thing you like to paint for inspiration. We are surrounded by colour schemes that talented and and trained colour experts have designed to attract our attention and be visual pleasing. Anything that attracts the eye or where the colours just seems to work can be inspiration for a great colour scheme. This includes all kinds of artwork, but also movie scenes, photography, home decor advice, product packaging, and advertisements. We generally find natural colour scenes visually pleasing – a flowering bush on a sunny day, a vivid sunset or other scenic vista.
 Miniatures and fantasy art are great inspiration, but so are the colours of clothing patterns, home decor suggestions, and many more!
It is often easier to decode and put into use a colour scheme drawn from design or decor than it is to figure out and adapt the colour complexities of a detailed painting. There are also a lot of books and webpages designed to help people choose colours, and those aimed at web page and print designers, home decorators and the like, can be very useful.
Most of us always have a camera on our person thanks to our smartphones. When you see a colour combination you like – take a picture! Then favourite it or sort it into a specific directory you keep for colour inspiration so you can easily find your colour scheme inspirations later. Sunsets, flower beds – you’ll run across all sorts of colour inspiration out in the real world as well.
The colour scheme for Elanter comes from a World Market flyer. I was looking through mail for paper to recycle, and the pile of pillows on the corner of one page of the flyer caught my eye. The colour palette struck me as having a very autumnal feeling while not being the typical fall colour scheme. (Not that I don’t also love a typical fall colour palette!) I really like this colour scheme, but I don’t think I would ever have come up with it on my own.
 My colour scheme inspiration.
![]()
Steal the Right Colour Schemes
There are some instances where colour schemes that work for one function, like home decor or a webpage, will probably not work as well for a miniature. When assessing a colour scheme, consider whether there is a mixture of colour values. Is there at least one pretty dark colour, one pretty light colour, and one moderate value colour? Variation in values between areas on a figure makes it easier for viewers to read and identify what’s skin, clothing, armour, etc.
The pillow colour scheme had a dark green and light cream colour, with the flesh tone, orange, and silver in values in between those two extremes, so I was pretty confident it would work well for a figure.
Analogous colour schemes are common in design, but I think they’re pretty tricky to use on miniatures. An analogous colour scheme is 2-5 colours that are adjacent to each other on the colour wheel. Yellow, orange, and red would be one example, and blue, teal, and green is another.
The reasons analogous colours are challenging on a figure is that analogous colour schemes remove or constrain your options for contrast. We generally use analogous colours for shading and highlighting our miniatures. Even if you vary the values of the colours to help define your areas, you’ll be using similar colours for highlights on your mid value areas as you use on your lightest area, and similar colours for highlights on your darkest area as you use on your mid value areas. This can work well on a simple figure like a fire elemental, but would be more challenging on a humanoid with more complex gear.
 Speed painted with an analogous/monochromatic colour scheme. Since human hair and skin are shades of browns and tans, this colour palette looks pretty natural, but it would be more visually striking with even a bit of subtle colour variation. Note the way it pops a bit off of the cool blue background due to the hue and temperature contrast between the warm browns on the figure and the cool blues of the background.
Analogous colours also minimize temperature contrast. Generally speaking all of the colours will lean more to the cool or the warm side. Depending on which colours you pick, there may be a pair where one is somewhat warmer and one is somewhat cooler in comparison to each other, but this is much less contrasted than choosing complementary colours that are opposite each other on the colour wheel.
 The palette I used to paint the cowboy – desaturated reds, oranges, and yellows (aka shades of brown).
I’m sure it’s possible to successfully use complementary colour schemes on a miniature! But if you’re stealing colour schemes because you’re struggling with colour, an analogous colour scheme is going to be more challenging than something with a wider mix of colours.
![]()
Steal ALL the Colours
Colour is relative: our perception of a colour is strongly affected by the colours that are near it. That is not always obvious. We may look at a miniature and admire the vivid blue that the person used, or we might love the look of a purple in a sunset sky. But if we try to take the colour we like from here, and another we like from there and combine them, we often find they don’t look great together. If we’re struggling with colour, we will have more success if we borrow the whole of a colour scheme.
When we want to borrow the colour scheme of another figure, or fantasy art or photograph with a person in it, we tend to just look at the character and the colours are on it. It’s easy to overlook the background of a movie scene or the base of a figure, but the soft blue of a sky or pale green grass on a base might be part of what is making the colours on the figure itself pop.
Excluding some of the colours won’t necessarily result in an unattractive figure, but it can have a significant impact on the overall mood and tone of the finished paint job. My painted version of Masquerade Sophie incorporates only the colours on the figure. It does not have the black or red from the background and accents of the colour art. As a result, the lighter and more pastel colours are more visually dominant on the figure compared to the art. The painted figure works in terms of colour, and it is an attractive figure to look at, but it doesn’t have any of the ominous tone of the art. If that had been part of what I was trying to capture in the colour scheme, I would be disappointed by my end result.
 Artwork by Izzy ‘Talon’ Collier.
This example is a figure I painted in 2008 for Dark Sword Miniatures. It is based on the DragonCon 2006 poster painted by Larry Elmore. I followed the colours for the figure itself fairly closely. In Elmore’s artwork, there are several other colours that are prominent in the colour scheme that are not represented on the figure, including the red of the dragon and the soft yellows and oranges of the sky. The colour scheme on the figure works (everything goes with black, after all), but the colour interaction in Elmore’s art is much more complex.
 Poster art by Larry Elmore.
Compare the miniature above as painted with the digital edit below. The red behind the figure helps make the skin really pop, and the lighter sky and base colours do the same with the black boots. I did not edit anything on the figure itself, just added the background and base colours.

![]()
Steal the Right Colours
Because colour is relative, the colours surrounding a colour may make it appear darker or lighter, more saturated or duller than it is when viewed in isolation. This is the basis of many common optical illusions. You need to take this effect into account when you’re trying to mix or match the colours in your chosen scheme to your paints to get the best effect from your inspiration.
 You perceive the top square as darker than the bottom square. Hold your finger over the middle and discover that they’re the same shade of grey. Your eye is fooled because the colours that surround and separate the two squares influence how you perceive their colours. Picture by Dale Purves.
The following is an example of how even in general art and photographs, our perception of a colour is affected by the surrounding colours. One of my paint buddies, Jen Greenwald, was using a painting for colour inspiration, but finding that it wasn’t quite coming out as she expected on the miniature. I sampled the colours and discovered that the reds the artist used in the auburn hair were actually much less intense colours than Jen had supposed when picking out her paints. The proximity and the large volume of greens and teals in the inspiration image make the reddish-brown appear more saturated than it is. Jen chose brighter reds for her paints, and found they looked too intense on her figure. She matched the teals well (using brighter highlights, which will often be necessary on a figure), but was a bit off on the red-browns.
 Fantasy painting by Anna Dittmann. Miniature painted by Jen Greenwald.
There are a few different tools you can use to isolate colours to see them more accurately.
Digital Colour Sampling
If you have a digital version of your inspirational colour scheme, you can use a variety of different programs to isolate and sample colours. You need a program with an eyedropper sample tool and a brush that you can use to make a swatch of colour. You sample the colour you want, and then paint a large swatch of it, ideally on a plain white background.
On my desktop, I use GIMP, which is a free alternative to Photoshop that is available on Mac and PC. On my iPad I use the Procreate program. It is not free, but I have found it well worth the one-time $10 fee. There is a Procreate Pocket for iPhone that costs $5 that has the sample and paint features.
Don’t try to find one single overall colour in a complex image. Even on something like my ad flyer, the pillows are being affected by the light and have areas where they appear lighter and darker. I will find it much easier to match colours and create highlights and shadows for my miniature painting if I sample from light, midtone, and dark areas of my image. It also helps me identify the range of contrast between the lightest areas and the darkest areas, which is often much more dramatic than we think, even in fairly flat, bright light like like that used in my ad flyer.
Below is an example of the areas I would sample to see the colours on my flyer colour inspiration.

If you compare the image and the swatches, you may find at least one of the pillow samples is a different colour than it might appear to your eye. The second pillow from the top looks yellowy-cream coloured to me, but when I colour sample on it, many of the colours have a green cast to them. The photo above is intended to demonstrate how to sample from various value areas. I recommend that you make the colour samples larger than that. Then you can print the page out to test colours against.

I printed out a page with my sample colours on it, and then tested potential colours against it, as you can see in the following photo.

Physical Colour Sampling
My flyer was a printed object, so I could try to match colours directly against it. This is just an ad, so I might not mind painting directly on it to test colours. If it were something I could not paint on, I could paint samples on the edges of another paper and hold those next to the image to see if the colours match. Let your paint dry before assessing the match. Wet paint is shiny, which makes it harder to compare to dry paint, and which can make it look a little darker or more saturated. In the picture below I’m comparing some of the paints I chose against my example colour scheme.

When comparing against a physical sample, I might still run into the issue of not being able to accurately see all of the colours. You can isolate colours on a physical item by cutting a small hole into a piece of paper. Using midtone grey paper will make it easiest to judge value and saturation, but even using a little hole in a piece of white paper can help. I cut a hole into a piece of index card to isolate an area on the dark green pillow in the picture below.

Colour Shifting with Image Source
For my colour scheme, I started with a physical advertisement. I took a photograph and then scanned the source to be able to digitally sample it. Then I had to print those digital samples to be able to test paints against them. If you compare each of these steps to one another, the colours shift slightly. Every camera processes colour a little differently. Each screen displays colour a little differently. Every printer prints colour images a little differently. Doesn’t that matter? I don’t think that the slight shifts between sources matter because the entire image gets shifted from source to source. Whatever colour cast your camera/screen/printer may have, it alters the entire image in the same way, so the colour scheme remains unified and effective.
In the image below, the colour samples on the left side are from the photo taken with my camera, and those on the right are from the image made with my scanner. There are slight differences, and I might prefer one to the other, but each functions as a cohesive colour scheme within itself.

Testing a Colour Scheme
Testing your colours is the most important step. Regardless of how much effort you spent on the preceding tips, it’s always worth a few minutes to do a quick test of how well your colour choices work together. This is especially important if you did just eyeball matching the colours to your inspiration.
When using inspiration to find colour schemes, the important question is not how well did you match your inspiration, it’s do these colours go well together? Learning to match and mix colour matches is a great way to improve your eye for colour, of course, but exact colour matching is not necessary to be able to find some great colours to paint on a mini! (Whether the colours go together is also the important question about your chosen colours when you chose them with a colour wheel or your imagination or some other source.)
I painted the following colour swatches while testing the colours for Elanter on stream. I used a piece of tan toned paper. Grey works even better, but white is fine if that’s all you have.

My goal here is to check if the colours all seem like they’re playing nice together. I tested prospective highlight and shadow colours as well as the main colours, since I find it hard to assess using just flat midtone colours. There are lots of ways to test colours! You can test on a quick speed painted figure, just a part of a figure, swatches on paper, or bad drawings on paper, as you can see in the examples below. (Not pictured is a digital method for testing colours.)

![]()
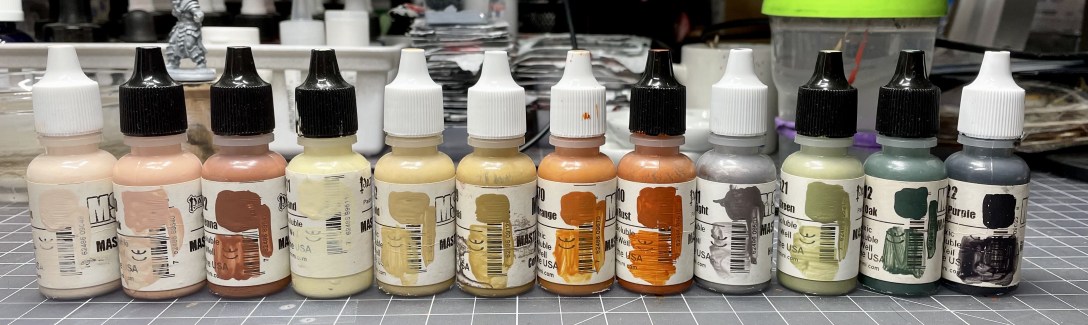
Paint Colours Used on Elanter the Lost Prince
These are the colours I used to paint Elanter. I didn’t plan in advance to use a number of the Pathfinder colours (the 89xxx paints), they just happened to be the ones that fit in well with my colour inspiration! I can’t follow all of my usual process when I’m painting on stream, so this colour recipe information may not be as accurate as that I usually provide.
Skin:

Light wood bow:

Dark wood staff (faux wood grain):

Green cloak:

Rust overdress:

Metallics:

![]()
Figures in this Post
Elanter the Lost Prince is available in Bones USA.
Tywin Lannister is available in metal.
Deadeye Slim is available in Bones plastic or metal.
Masquerade Ball Sophie is currently available in metal, and in plastic via the Bones 6 core set.
Goth Warrior with Sword is available in metal.
Callie Ranger/Rogue is available in Bones plastic or metal.
Anirion, Elf Wizard is available in Bones USA plastic, clear plastic, or metal.
Isabeau Laroche, Paladin is available in Bones plastic and metal.
Geisha Assassin (colour tested on Isabeau) is available in metal.
Seoni, Iconic Sorceress is available in Bones plastic.
Male Bard with Lute is available in metal. (Colour scheme on paper.)
Arran Rabin is available in Bones plastic and metal.
Children of the Zodiac, Cancer is available in metal.
Wing from Griffon, available in Bones plastic or metal.
