Ko-fi tips help keep this content free. Patreon supporters receive PDFs with high res photos.
In the many years that I have been entering and judging miniature competitions, I’ve noticed some common pitfalls and mishaps. In the article series I’d like to share some suggestions that will help you show off your hard work to the best advantage. Even if you’re not interested in contests, many of these tips are relevant to anyone looking to improve their work.
At the bottom of the page of my contest article, you will find a list of in-person conventions and shows that feature miniature competitions. It also provides an overview of the different contest formats and judging methods.
 Elizabeth Beckley’s contest entries at the Atlanta Model Figure Show.
![]()
1. Build a Solid Foundation
Judges assess entries not just for painting quality, but also overall craftsmanship. Minor issues can make or break your chances in a top three contest. Imagine that the judges are considering two figures for third place. The pieces are fairly equal in painting skill, effective use of colour, etc. The judges start to look for small things that have been done better or worse. If they spot noticeable mould lines, a gap in a join, or some other kind of workmanship issue on one figure, the other figure will be selected for the award. In a scenario where the judges must choose between a piece that is slightly better painted but has construction problems, versus one that is well constructed but slightly less inspired in paint, the latter is likely to win.
How important craftsmanship is can vary with the category, or even between competitions, but if you’re looking to make your entries more competitive, you need to practice your hobby skills as well as your pure paint skills. Workmanship is a smaller element of consideration in the Painters category at an open show format like the MSP Open, but basic or egregious issues could still affect your maximum medal placement potential. Workmanship is a much larger part of what is considered in the Open category.
Areas to consider:
Mould Lines
We all hate ‘em. They’re a pain to deal with in every material. At a minimum you should remove pronounced mould lines or those that travel over prominent areas viewers will easily see. This would include on the face and areas of skin in general, and large smooth expanses like a cloak or robe. At the MSP Open, visible mould lines will not prevent placement at the Bronze medal level, but are considered as more serious issues on pieces being considered for Silver or Gold medal levels.
 Mould lines on a plastic figure coated with a layer of paint (left) and bare metal figure (right).
Assembly Gaps
When you glue an arm or a head on a multipart figure, sometimes there is a gap at the join. So instead of the appearance of smooth flesh, it looks like there is a crevice or divot at the shoulder or the elbow. These kinds of gaps are also found on figures that are sold pre-assembled.
Gaps are best addressed prior to painting. Modelling paste works well to fill small gaps. You may need to use a two part putty like Greenstuff or Milliput to fill large gaps. Putties also add to the structural integrity of joins. You can use these same materials to fill gaps on pre-assembled figures. If you have a figure that has excess glue in the join areas, you can carefully chip it off with a hobby knife.
 An assembly gap on a plastic figure. Metal figures can be even more problematic since different pieces may experience different levels of mould compression in casting.
I recommend using pins when you glue parts together, particularly on metal miniatures, and particularly for gaming miniatures. Pinning increases the strength of the join and reduces the chances that the join will break during transit or handling. This is less of an issue for lighter weight plastic or resin miniatures.
It’s easiest and most efficient to complete all gap filling and assembly prior to beginning to paint, but sometimes that is not possible. When it is not, try to dry fit all the pieces to check that they go together as well as possible prior to painting. Paint only as much as you need to before you can put the pieces together. Once you’ve assembled, check if you need to do any gap filling or paint touchup, and then continue with the rest of the painting.
Floating Feet
It’s fairly common to attach a figure to a base via a pin in one of its feet, or its cloak or whatever other part appears as if it is touching the ground. It’s fairly common for this attachment to not appear as if the figure is 100% flush with the ground. This is another gap that needs to be addressed. If the feet or clothes that are supposed to be touching the floor appear to be floating above the earth, it breaks the illusion of the scene, as well as being a craftsmanship issue. You can use the same gap fillers as with figure assembly. It is worth filling the gap and doing a little repainting even if this occurs when gluing a fully painted figure to a fully painted base in the end stages.
 I learned to plant the figure on solid ground early on, so I don’t have a lot of examples at hand. The figure in the above photo is pinned via the opposite foot. This foot was glued down, but has broken free of the glue and is floating. A photo of the solid footing version is included in the Category Divisions section below so you can compare.
![]()
2. Paint the Base!
Basing materials like sand, rocks, and gravel need to be painted, for the same reasons we paint figures. The reason we add washes/shadows and drybrushing/highlights to figures is because they don’t really look three dimensional under standard lighting. We are simulating the light and shadow effect that in-scale lighting would create on the figure.
You need to paint rocks and sand even if the materials are the same colour you want for your base. If that seems counter-intuitive, compare it to how you treat a figure. You want a grey wolf figure. If you have a grey plastic wolf figure, you still paint it. Adding washes and drybrushing makes the subtle musculature and fur texture that the sculptor has applied much easier to see. Even though nature is the sculptor of rocks and gravel, you still need to add washes and drybrushes to make their textures apparant to the viewer.
Painting both the figure and the base also makes them appear as if they exist in the same world. Using some of the same colours you painted on your figure helps unify your colour scheme and lighting. If you used a dark blue or brown on your figure’s cloak, you could use the same colour as a wash on your stones or earth. I often use lighter colours that I used in painting the flesh or leather for the lightest highlights when drybrushing stone or dirt.
(I learned this tip soon after I started painting so I don’t have a convenient example, but will try to add one as time permits.)
Softer materials like static grass, undergrowth, and leaves are usually pre-coloured. They may not need to be painted over, but they often still benefit from the application of a little paint. For example, applying a wash on the grass with a shadow colour from your figure can help, dull down bright grass that might compete for attention with your figure’s gritty colour scheme. Drybrushing the tips of the grass/vegetation can also contribute to your scene. You can use a light greenish-yellow if you want the grass to look healthy, or a brown or tan if you want it to look like it’s dying. Adding some paint to your basing materials doesn’t just look more realistic, it also helps you tell more of a story!. I recommend doing some tests before adding paint to your materials prior to use on contest entries. I’ve had some grasses and vegetation that resisted the paint a little and caused spatters. When I want to use these, I paint them separately and then glue them on to the piece after the paint has dried.
At the MSP Open, unpainted basing materials are a not a deal breaker for placement at Certificate or Bronze levels, but it would affect consideration for Silver and Gold levels.
![]()
3. Clean up Your Act
Quick and even slapdash may be the key to getting a figure to the game table quickly, but entries that have a high degree of finish tend to place better in contests. This is a particularly important factor in top three style contests where the discovery of an unpainted area or messy paint spatter or streaks can make the decision for a judge who is torn between two figures for a placement.
After you’ve finished assembling your figure and constructing the base, check for things like blobs of excess glue, basing sand on the rim of the base, fingerprints or dents in putty, etc. Tidy these up as best you can.
At the end of the painting phase, carefully check the figure for stray streaks of the wrong colour paint, bits of primer showing through, or a small item you completely forgot to paint. (It happens. A lot!)
I find it helpful to take photos of the piece from a few different angles. Photos are larger, and give you a somewhat different view of the figure. I take notes of things I want to fix or change while looking over the photos, to make sure I don’t forget anything once I got back to my paint desk. I shared an example of my process for that when painting Tara the Silent.
 That paint streak on the apron was even more obvious in real life because it was shiny steel metallic paint! There is a before and after revisions example with this figure.
![]()
4. Consistency Counts
People often think that use of a ‘flashy’ technique or effect is required to do well in a miniature painting contest – something like freehand, source lighting, texturing, weathering, non-metallic metal (NMM). Those effects definitely do provide ways to demonstrate brush skills, creativity, and an understanding of light. And since so many people think of those as difficult or advanced techniques, they can certainly attract votes in popular vote contests.
In contests and shows judged by experienced painters, however, it isn’t always the case that you ‘need’ to use one of those effects. If you use a special technique or effect on your figure, the judges will assess how well you executed it, in addition to considering the overall painting skill you demonstrate on the piece. It’s also important to remember that the judges are looking at the figure as a whole. If you painted some jaw-dropping NMM on the weapons but only applied a basecoat and a wash to the leather, remember that the judges will consider both in their assessment. Many competition painters have been in a situation of having spent hours and hours on the main parts of their piece only to run out of time and have to phone in a few areas, and it has made the difference in where they placed, or if they placed at all.
Another way to think of it is this – your figure isn’t being assessed only by the single best part of it, nor only on the single worst part of it. The judges are looking at it as a whole, both in terms of how well you convey the story and character of the figure(s), and in considering a sort of ‘average’ skill level of the hobby and painting skills used throughout the piece.
 I entered the version on the left in a contest. I ran out of time before I could add wood grain texture to the staff. When I went back later to paint that in, I also realized that some areas of the non-metallic metal and leather textures did not have enough contrast, and I adjusted those, too. The changes are most noticeable on the staff. The level of detail and finish on the staff on the original figure does not match the painting level of the rest of the figure. There is a close-up below. (Any differences in colour, as on the hair, is due to the photographs.)
 In this close up of the staff you can see that I added both texture and also more contrast. Compare the shadows in the crevices and under downward facing curves in the before and after versions. The after fits better with the levels of contrast and detail on the rest of the figure. In MSP Open terms, the original version of this figure would probably have been awarded Gold level, but it’s possible that one or more of the judges might have judged it Silver quality based on the weaker areas.
In the MSP Open (and other show format competitions), people are often surprised by which figure from their display that we choose to judge. Usually they expect the judges to choose a piece that includes a more challenging technique or effect that they struggled with. Sometimes we chose another figure than the expected one because we feel it better comes together as a whole, or that it displays your overall skills to better advantage. The fact that something felt simpler to paint doesn’t necessarily make of lower quality than something that felt really challenging. It may only have felt simpler to do because you were using skills that you have more mastery over.
Note that painting a figure consistently throughout doesn’t mean that you should paint every part of it using the same amount of contrast, the same number of layers, etc. If you read the Focus section in my Mistletoe Goblin post, it gives some examples of making decisions to emphasize some sections of the figure and deemphasize others to create areas of focus. The basic idea of painting a figure consistently but also with focus is that you need to paint incidental items like belt pouches to the degree that they look finished and like real items that are part of the scene, and then use tools like bright colours/contrast/freenhand on the areas you want to attract the most attention, like the face.
 Note that consistency is relevant to all levels of entries. The skin, pouches, and shield of this bugbear are painted with good contrast. Some other areas are painted decently but not quite to the same standard. The face isn’t all defined or interesting to look at, and there are a few other sections that are just flat basecoats. In MSP Open terms, the painting on the pouch and shield might meet a Silver level standard, but the face is Certificate level, and other areas are Bronze level. This would be awarded Bronze at best. (Award levels cited are for example purposes only.)
![]()
5. Read the Rules!
I know it sounds obvious, but ask just about anyone who’s entered contests for a while and they’ll have a story of how they or someone they know was disqualified from consideration for rules-related reasons. Misreading the rules can also result in having your entries shifted into a different category than you intended. Read the rules before you begin working, and then read them again while you’re working. I’d go ahead and read them again just before the event, as well. It’s easy to misread something or confuse it with how the rules work in another contest.
Many contests tweak their rules from year to year, so even if you’ve entered that contest previously, it’s best to read this year’s rules to be certain you’re familiar with them. Unfortunately, it is not uncommon for contests to take a while to upload the rules each year. All of these efforts are organized by volunteers and can take much more coordination with other entities than you might imagine, so delays are often unavoidable. If you need to make an early start on an entry, you may need to proceed as if the rules will be similar to the preceding year, and hope you can shift gears a little if you later found out that a rule has been altered.
I’ve made rules-related goofs myself. Long ago Reaper ran a monthly contest on their forum. The rule at the time was that you could include multiple views of the figure, but each photo had to be uploaded individually and not combined into one large picture. I combined, and I was disqualified. On another occasion, I entered a unit into the contest at Gen Con. I assumed the rules were the same as the previous year. When I arrived at the event I discovered the rules had been updated to require that units now needed to be submitted with a movement tray or base. I had to scramble to find something suitable in the vender hall, and quickly painted it flat black (with paper towels!) in order to be able to submit my entry.
 Paper towel and black paint to the rescue!
Areas to look out for particularly in the rules are:
Size
There may be a size limit for entries. Sometimes people with larger entries are asked to contact contest management in advance to check if there is room, or to reserve space for their entry. Remember that the size applies to all three dimensions. Sometimes the limitation is in place because of the height or width of display case shelves.
Category Divisions
Many contests divide entries into different categories. These may be based on subject, size, number of figures, or other criteria. Make sure you understand the guidelines for a category you plan to enter as well as possible. A piece that depicts a victor with a subjugated victim at their feet might fit into different categories at different competitions. One contest might allow the piece in single figure and consider the victim as just ‘scenery’. Another contest might rule that the piece is composed of two figures so it can’t be entered in single figure. Be aware that most contests reserve the right to shift entries to more suitable categories or combine categories if there is a category that receives only a few entries.
 Are the skeletons on the base scenery or characters? One contest might allow this in single figure, another might require it to be entered in diorama.
Category Divisions in the ReaperCon MSP Open
People are sometimes confused about which category to enter in the MSP Open at ReaperCon. The following includes some guidelines to consider when choosing your category. If the team judging your piece feels it is likely that would receive a higher level award if your entry was transferred to another category, they will transfer it. (If you already have entries in the other category, the entry will be kept in the original category.)
You can review the entries from previous years by category and look at their placement awards in the galleries of the Painting Contest dropdown menu on the ReaperCon site. Scanning the entries from the past couple of years can give you an idea of what fits best into which category.
There is an index of MSP Open questions, which includes specifics on categories and expanded information on the judging process, thoughts from judges, etc. on the Reaper forums. I have an article with answers to common MSP Open questions which includes example pieces that best fit each category and provides expanded information on judging considerations.
Painter
The majority of what the judges consider is paint based – colour choices, skill of paint application techniques, success of paint related effects, etc. Paint elements are 70% of the consideration in this category. The other 30% of what is considered includes presentation, workmanship, and creativity. Basing, conversion, and sculpting can contribute to those elements. Adding some scenic elements to your piece gives you additional textures and surfaces on which to demonstrate your painting skill, and can also make your piece much more creative, but it is not required. Entries in Painters can earn Gold medals with simple, well-painted stone bases or plain plinths. Creative and well-done basing and scenic efforts can improve your chances to be considered for the manufacturer awards and special prizes, however.
Open
This category is intended for pieces that have been heavily converted and/or scratch sculpted. The Gold plus standard here is a figure sculpted completely from scratch that is also expertly painted. A figure with a simple weapon or head swap on a basic base is not likely to place higher than bronze, regardless of how well painted. An elaborately constructed base is also unlikely to be awarded high placement if the figure(s) on it are stock or only lightly converted. In Open, paint related elements are only 30% of the consideration. Workmanship, difficulty, and presentation are highly valued in this category.
Diorama
The focus here is on story. A simple piece with two figures telling a clear and evocative story may place higher than a complex scene that includes multiple figures with weak interaction or unclear story. Sculpting and conversion are valued in this category, but a compelling story told with well-assembled stock figures and pre-made scenic elements can also earn high medal placement.
Ordinance
Workmanship and painting skill are weighted fairly equally here. Weathering and evoking the appropriate environment for the vehicle are helpful to demonstrate these. Any figures that may be present are considered in the same way that as scenic items would be on a figure’s base in another category. The focus is on the painting, staging, and presentation of the vehicle itself.
Basing Guidelines
Some contests have rules related to basing. Contests sponsored by gaming companies may require game-legal sizes and shapes of bases. Units may need to be entered on a movement tray. Plinths may or may not be allowed. In all cases there may also be guidelines of whether or not the workmanship or scenic elements of additional basing like trays and plinths is considered in judging.
There was at least one year at Gen Con where several units were entered on paper plates. The contest required a movement tray so judges could safely transport the figures to and from the case for judging, but the tray itself was not considered in the judging. I heard about another contest where painters who customized their plinths who were disappointed when they learned that the plinth was not photographed or considered in the judging of the entry.
![]()
6. Don’t Forget Manufacturer and Special Awards!
Many show competitions and convention contests have a central structure for awards, but also have one or more supplemental awards. The supplemental awards are often sponsored by manufacturers, but there may also be awards for particular subject matter or other elements. It’s always worth checking to see if there are awards for your favourite manufacturer(s). Using their figures in your entries will help them by showcase their products, and give you a chance to win some prizes and recognition. I’ve been at many a competition where manufacturer contests were lightly entered, even when the manufacturers were offering generous prize support and/or cool trophies! That said, it is generally the case that higher value cash prizes attract more entries, particularly if it’s from a company that’s well-established and popular.
 The medals at the front are the general awards for the MSP Open in 2019. All of the other trophies and items are special awards and prizes!
At ReaperCon, the main MSP Open is a competition that is open to figures made by any manufacturer (or scratch made). Reaper also sponsors top three trophies in each of the main categories, as well as special awards for entries of Mouslings or giant-sized monsters. There are numerous additional manufacturer awards. The Atlanta figure show includes additional awards for best flat, best Napoleonic era, and best fantasy, among several others. Gen Con’s contest usually includes several manufacturer awards.
 The special awards table at the Atlanta Model Figure Show.
![]()
You’ll find more tips in Part 2 of this article.
Figures in this Post
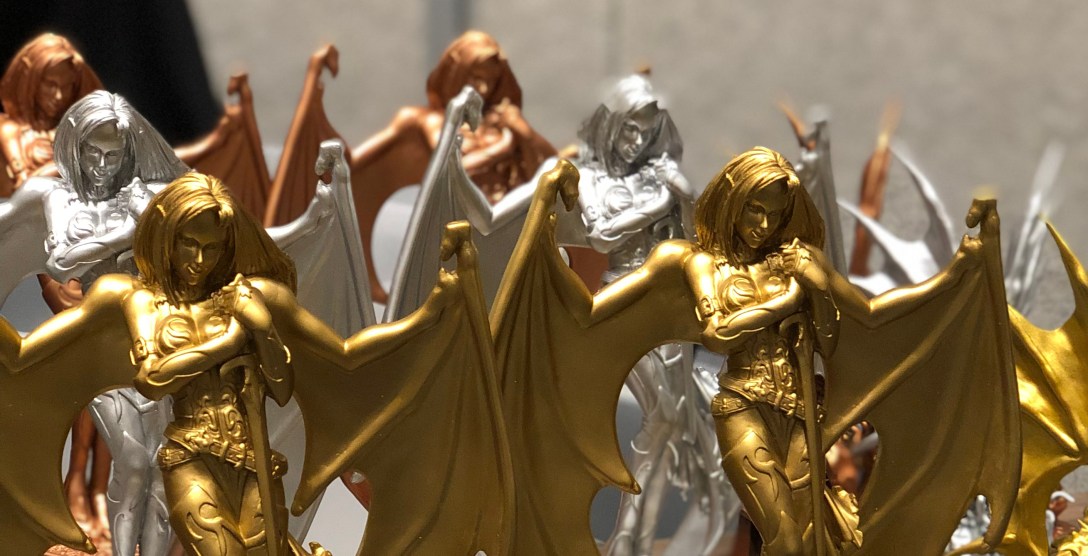
Savage Beauty by Black Sun Miniatures
Beorogg Black Rime Frost Giant Jarl is available in plastic or metal.
I don’t know the dwarf and chibi figures
Torlan the alligator man
Blacksmith is available in plastic or metal.
Frost Giant Queen
The Bugbear is available in plastic or metal.
The Heresy Inspectors
The sorceress is out of production.
